Tip: Many buttons and labels in this application have tips associated with them. Simply hover your
mouse to reveal the tips.
If you are currently logged into the Demo account, click "Log Off" in the floating menu and click the "Create Account" button at the bottom of the login form.
If results are found, the status box under your company name will indicate the number of results returned. You can cycle though results using the arrow keys on your keyboard or by clicking the navigational buttons at the top of the contacts pad by the "Find" button. The double “>>” skips 50 records at a time allowing you to quickly move though records.
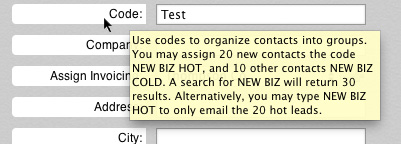
One of the most powerful features of Vantage Desktop Pro is the code field. Assigning codes to contacts allows you to group contacts for organization and marketing purposes. If for instance you want to email all of your hot new business leads, and assuming you have them coded as “NewBiz Hot” when you added them, you could just search for “NewBiz Hot” in the code field, hit enter, get your result, then hit export and load that list into programs like Constant Contact®. Or maybe you have cold new business leads also and want to target both groups. In that case you would simply search “NewBiz” which would return all “NewBiz Hot” and “NewBiz Cold” records. You can even take it further and combine your code with other fields. So you might search “NewBiz” in the code field and MO for the state field. This would return all new business leads in Missouri. Codes are completely customizable so you can create the codes that work best for you.
Click the “Add” button at the top of the Contacts Pad (or the main form in the application). You will be presented with a blank form you can start filling out. Once complete, click the “submit” button to store your new contact. After you have submitted your contact you will be switched into “Edit Mode” where you can made additional changes (see “Editing Contacts” below.)
After you have located a contact you would like to edit in a search, you can simply start making direct changes right away. When you edit a field, that field will be highlighted with a red border indicating that your changes are about to be saved. Once you stop typing, a timer is set and about one second later your change will be automatically saved and the standard border will be restored.
If you have contacts with similar information (maybe you are adding a new contact from a company that's already in your database) you can click “Duplicate” at the top of the Contacts Pad while on an existing contact. Now you may only need to change the name, number, and email to finish adding your new contact.
After you have performed a search, you can click the "Options" menu and choose "Mail All" or "Mail This". To print envelops for every contact in your lookup, choose the former. To print an envelope for the current record, choose the latter. If page titles and numbers appear in the margins of your envelops, check your web browser's print settings in the print dialog box.
After you have performed a search, you can click the "Options" menu and choose "Export". This will save an Excel version of your search results you can use to import contacts into your favorite mass mailing software.
After you have located a contact you would like to edit in a search, you can set that contacts birthday at the bottom of the Contacts Pad. Once set, the message configured in the “Configure Message Here” link will be send to that contact on his or her birthday. The message is global for all contacts with a birthday entered.
There are a total of six fields at the bottom of the Contacts Pad that can be assigned to whatever label you would like. To discover the custom fields, just hover your mouse over the field label and a box will appear with directions on how to edit the field. If you double click any of the fields it will turn into a text field that you may then edit to your liking. To save your change hit the enter key.
Click the “Add” button at the top of the Invoices Pad. You will need to assign a company to your new invoice by choosing a company from the drop down list. If the company isn't listed, click the plus sign next to the drop down to add a company. If you added new a company, you will have to click the “Add” button at the top of the Invoices Pad again. Note that the list of companies here is not tied to the companies in your contacts for various technical reasons. If you use the exact spelling for the company name you have used for your contacts, your invoices will automatically filter showing only that companies invoices when you are browsing contacts. Otherwise your Invoices Pad will show all invoices.
After your invoice is generated you need to assign a job to it. Each invoice can have multiple jobs. For instance a contractor might have completed bathroom work and kitchen work for a client in one month and would like to put all of that work in one invoice. The kitchen work would be on job titled "Kitchen Work", which it's own hourly rate, and the bathroom a separate job titled "Bathroom Work". Both can appear on one invoice.
Click the “Add Job” in the options menu next to your new invoice. Choose an appropriate job title, and if applicable, rate then hit enter. A rate will only apply to time billing, so If you are going to bill a fixed price for a job or line item (maybe materials), just leave the rate 0.00.
After you have added your job, you can add time or line items to that job within the options menu. You can remove items from an invoice by clicking “view/print” from the options menu and clicking on the red “X”.
Double click the word “Open” in the status column next to the invoice you want to close. You should see a drop down list appear. Choose “Close” then hit enter to close the invoice. You can change it back using the same method.
Double click the date in the date column next to the invoice you want to close. You should see a drop down list appear. Type in the new date (in YYYY-MM-DD format) and then hit enter to close the invoice. You can change it back using the same method.
Scroll to the “My Account Pad” at the bottom of the application and complete your company information then click “Save”. Your company information will now appear in invoices.
You can click any column header in the invoices list to sort invoices. For instance, you might sort by status to see all “Open” invoices at the top of the list. You can also isolate invoices by company by searching for that company in the contacts field (see “Filtering Invoices by Company” below).
After you have added a company to the companies list in the “Invoicing” field on the Contacts Pad; you can search for a contact and click the drop down to assign them a company for invoicing. Later when you search contacts, only the invoices for that contacts company will appear in the list. As you cycle though contacts, the invoices list will be dynamically filtered. To remove the filter simply hit “esc” or hit the “Clear” button.
You can print invoices by clicking the "Print" button at the top left of any invoice. You can remove page information from the margins by changing the settings in your browser's print dialog box.
Mac: Click the "Print" button at the top left of any invoice and choose "PDF", then "Save PDF" in the bottom left corner of the print dialog box. You can remove page information from the margins by changing the settings in your browser's print dialog box.
PC: Download and install win2PDF or cutePDF and follow the installation instructions. After you install, you can choose to print to PDF from your browser's print dialog box. You can remove page information from the margins by changing the settings in your browser's print dialog box.
You can unsubscribe by clicking here.
Phone support requires an unlimited account. Click here to upgrade now.